PATIENT SEX AND AGE
Female patient, 22 years old
MAIN COMPLAINT
Dissatisfaction with the shade of the teeth.
INITIAL EVALUATION
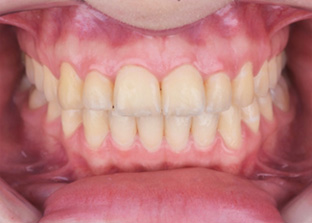
A clinical and radiographic examination was performed after a detailed anamnesis, in which the patient reported esthetic dissatisfaction with her smile due to the shade of her teeth and how this characteristic affected her social and professional life. The presence of periodontal disease and decayed lesions was not observed. Furthermore, the patient had good oral hygiene. No pathological shade changes were identified regarding the darkened shade of her teeth, and all teeth exposed to the forced smile showed vitality. Based on this information, a whitening treatment plan was drawn up, which presented a good prognosis relative to the patient’s esthetic complaint and expectations.
TREATMENT PERFORMED
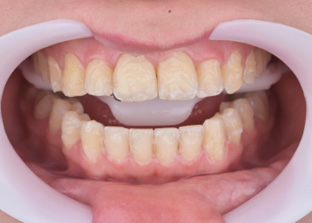
In the first appointment, arch prophylaxis was performed. At the next appointment, the initial shade of the patient’s teeth was taken (A-D shade guide), identifying shades B2 for the upper central incisors and B3 for the upper canines. Then, the arches were molded with alginate to obtain plaster models. Using these models, customized 1mm thick Whiteness silicone molds were made using a vacuum laminating machine. The trays were trimmed 1 mm above the gingival level and tested for fit, retention, and comfort. The next step was to carry out the first in-office whitening session. First, the Arcflex lip retractor was fitted to the patient’s mouth, and a desensitizer based on potassium nitrate and sodium fluoride, Desensibilize KF 2%, was applied to the teeth for 10 minutes. The gel was removed with plenty of water, and the teeth were dried with an air spray. Then, the Top Dam gingival barrier was applied to the region of the teeth where the whitening gel would be applied, in order to avoid contact of the gel with the gingival tissue and sealing the cervical region of the teeth that could have some dentin exposure, followed by photoactivation with Quazar for 10 seconds on each tooth involved. The application of the whitening gel with hydrogen peroxide Whiteness HP AutoMixx 35% PLUS was then started on the teeth, covering the upper (16 to 26) and lower (35 to 45) teeth. As the product presentation has a self-mixing tip, the first portion of the mixture was discarded until the hydrogen peroxide and thickener were homogenized. After 40 minutes of action, the excess gel on the teeth was sucked off with the aid of a surgical suction device, followed by abundant washing with water. At the end of the session, the patient was given customized trays along with White Class 7.5% hydrogen peroxide gel. The patient was instructed to apply a small drop of the whitener to the vestibular surfaces of the same teeth involved in the in-office whitening. It was recommended to use it for 1 hour a day, in the weeks between in-office sessions. At the end of the treatment, three in-office whitening sessions and 11 home whitening sessions were performed, with an interval of 14 days. As a final result, we obtained a significant shade change, going from shades B2 and B3 to shades BL3 and BL4.
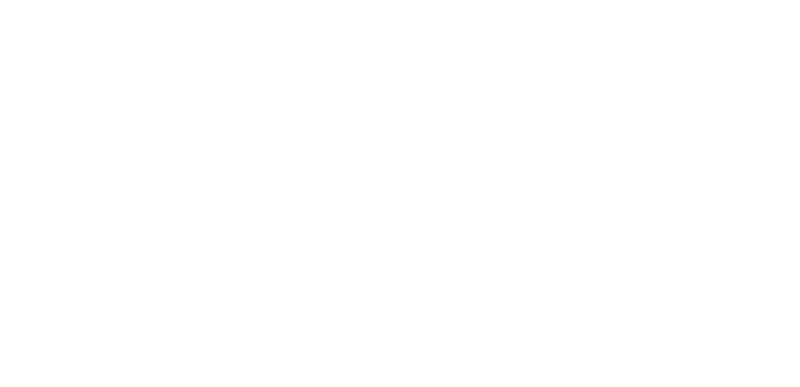
1 | Initial smile, front view
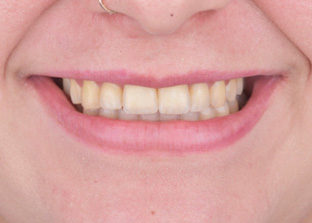
2 | Initial aspect, left side view
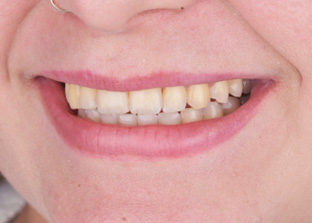
3 | Initial aspect, right side view
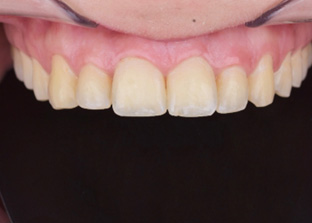
4 | Initial aspect, intraoral
5 | Initial aspect, upper arch
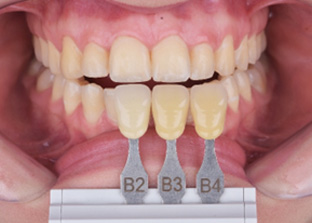
6 | Initial shade selection with scale
7 | Desensibilize KF 2% applied
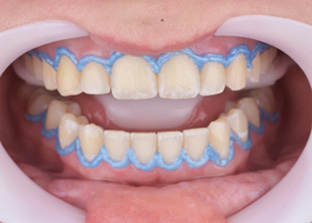
8 | Top Dam gingival barrier applied and light-cured
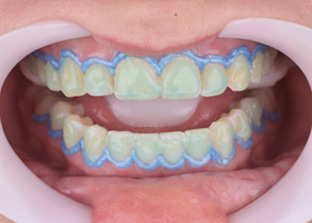
9 | Whiteness HP AutoMixx 35% PLUS whitening gel applied to the surface of the teeth
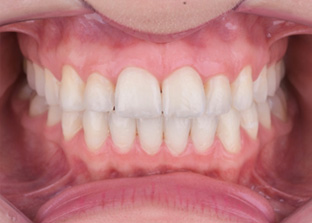
10 | Final aspect, intraoral
Get to know more: https://fgmdentalgroup.com/intl/whitening-products/whiteness-hp-automixx/